
This pressure cooker recipe creates tender, shredded chicken with a tangy and savory flavor profile. It is a fast, one-pot meal that is perfect for busy weeknights.
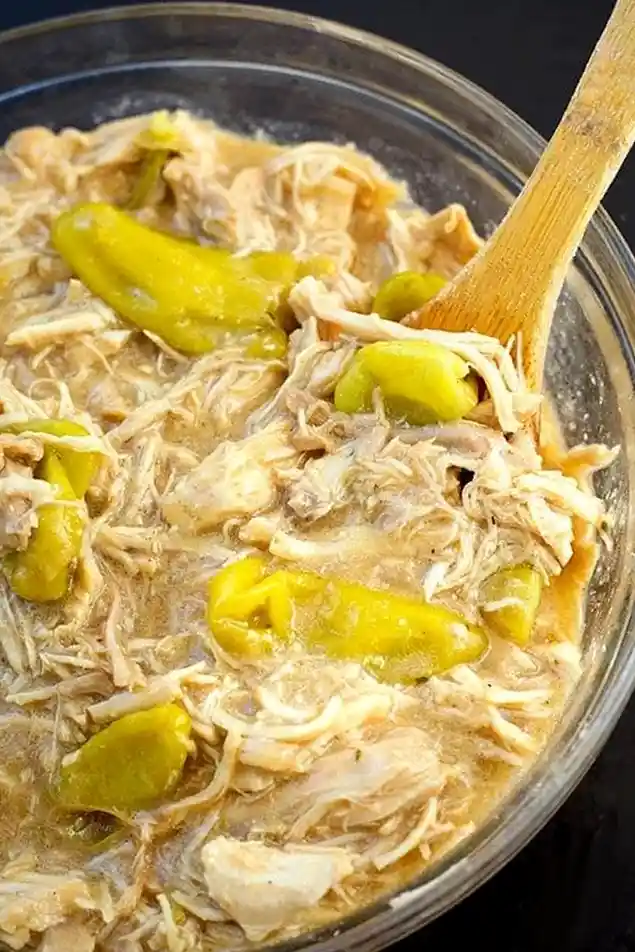
List of ingredients
- 2-3 lbs Chicken Thighs or Breasts – boneless and skinless; use fresh or frozen, and cut breasts in half if possible.
- 1/2 cup Water – low sodium chicken broth can be used as a substitute.
- 1/2 (16 oz) jar Pepperoncinis – include the juice; leave the peppers whole or slice them according to preference.
- 1 (1 oz) packet Au Jus or Brown Gravy Mix – Au Jus is the recommended choice for traditional flavor.
- 1 (1 oz) packet Ranch Dressing/Seasoning Mix – low sodium options are preferred.
- 1/2 stick Unsalted Butter – 4 tablespoons, or more depending on your taste preference.
- 1 1/2 cups White Long Grain Rice – ensure it is rinsed well (for the pot-in-pot method).
- 1 1/2 cups Water – specifically for cooking the rice.
step-by-step instructions
- Prepare the base: Place the chicken thighs or breasts in the bottom of the inner pot of the pressure cooker. If using chicken breasts, cut them in half to ensure even cooking.
- Add seasonings: Pour in the water or broth, pepperoncinis with their juice, seasoning packets, and butter. Do not stir the ingredients; leave them layered on top of the meat.
- Seal and set: Close the lid and lock it into place. Turn the steam release knob to the sealing position. Press the Pressure Cook or Manual button and set the timer for 8 minutes. If using frozen chicken breasts that cannot be cut in half, increase the cook time to 15 minutes.
- Release pressure: Once the timer finishes, let the pot sit undisturbed for 5 minutes for a natural release. Then, turn the steam release knob to the venting position to quickly release the remaining pressure.
- Cook rice simultaneously: If adding rice, place a tall trivet in the pot so it touches the bottom. Put the rinsed rice and 1.5 cups of water in a compatible stainless steel pan and set it on the trivet. Follow the same timing and release instructions as the chicken.
- Finish and serve: Open the lid and remove the rice pan using a pan gripper. Use tongs to move the chicken to a bowl and shred it with two forks. To thicken the sauce, turn on the Sauté function and stir in 2 tablespoons of cornstarch mixed with a bit of the hot cooking liquid. Stir until thickened, return the shredded chicken to the pot, and serve.
Optimizing Your Pressure Cooker Results
Managing Meat Temperature
When using frozen chicken, it is critical to increase the cooking time to 15 minutes to ensure the center reaches a safe internal temperature. If the breasts are very large, cutting them into smaller pieces helps the heat penetrate more quickly and evenly. Always use a meat thermometer to verify the chicken has reached 165 degrees Fahrenheit.
Preventing the Burn Notice
To avoid the dreaded burn notice, do not stir the seasoning packets into the liquid before cooking. Keeping the powders and the butter on top of the chicken prevents them from settling on the bottom of the pot and scorching. Adding the 1/2 cup of water or broth provides the necessary thin liquid base to create steam.
Achieving the Perfect Shred
For the easiest shredding, allow the chicken to rest for a few minutes after removal from the pot. Use two forks or a hand mixer on low speed to pull the meat apart while it is still warm. This allows the shredded pieces to soak up more of the savory sauce before serving.
Ingredient Modifications and Substitutions
Choosing Between Thighs and Breasts
Chicken thighs are generally more forgiving in a pressure cooker as they remain moist and tender due to higher fat content. Chicken breasts are leaner and can become dry if overcooked, which is why cutting them in half is recommended. Both options work well, but thighs provide a richer texture for this specific recipe.
Reducing Sodium Content
Since the seasoning packets can be very salty, look for low-sodium versions of Au Jus and Ranch mixes. You can also make a homemade ranch seasoning by mixing dried parsley, dill, onion powder, garlic powder, and black pepper. Using unsalted butter is mandatory to keep the salt levels manageable.
Adjusting Pepperoncini Heat
Pepperoncinis are typically mild and tangy, but some brands offer spicy versions. Read the jar label carefully to determine the heat level. If you prefer the flavor but dislike eating whole peppers, leave them whole during the cooking process and remove them before shredding the meat.
Liquid Alternatives
While water is a standard base, using a low-sodium chicken broth adds a deeper layer of savory flavor to the sauce. For a lighter version, you can increase the water amount and omit the butter, though the butter is what gives the sauce its signature velvety consistency.
Serving and Pairing Suggestions
Grain Pairings
The most traditional pairing is white long-grain rice, which absorbs the sauce effectively. You can also serve the chicken over mashed potatoes, egg noodles, or quinoa for a different texture. The acidity of the pepperoncinis cuts through the starch of these sides perfectly.
Tortilla and Sandwich Ideas
This shredded chicken is excellent for tacos, burritos, or sliders. Use warm corn or flour tortillas and top with fresh cilantro, diced onions, and a squeeze of lime. For sandwiches, pile the meat onto a toasted brioche bun with a slice of provolone cheese.
Low Carb Vegetable Options
For those avoiding grains, serve the chicken over steamed cauliflower rice or sautéed zoodles. Roasted cabbage steaks also provide a sturdy base that complements the tanginess of the sauce. Fresh steamed broccoli or asparagus can serve as a healthy side dish.
Fresh Garnish Additions
Adding fresh herbs after cooking can brighten the heavy flavors of the gravy. Chopped fresh parsley or sliced green onions provide a crisp contrast. A sprinkle of fresh chives can also add a mild onion flavor that complements the ranch seasoning.
Storage and Food Safety
Refrigeration Guidelines
Store the leftovers in an airtight container in the refrigerator for up to 3 to 4 days. Ensure the chicken is fully submerged in the sauce to prevent the meat from drying out. Let the food cool slightly before sealing the container to prevent excess condensation.
Freezing Instructions
This chicken freezes well for up to 3 months. Place the shredded chicken and sauce in a freezer-safe bag or container, pressing out as much air as possible. Thaw the meat in the refrigerator overnight before reheating to maintain the best texture.
Best Reheating Methods
To reheat, place the chicken in a skillet over medium heat or in a microwave-safe dish. Add a splash of water or chicken broth if the sauce has thickened too much during storage. Heat until the internal temperature reaches 165 degrees Fahrenheit.
Pot-in-Pot Rice Technique
Essential Equipment
To cook rice at the same time as the chicken, you need a tall trivet and a stainless steel pan that fits inside your inner pot. The pan should be about 6 to 7 inches in diameter. Using a pan gripper ensures you can safely remove the hot rice container without burning your hands.
Water and Rice Ratios
Use a 1:1 ratio of rinsed long-grain white rice to water. Rinsing the rice is crucial because it removes excess surface starch, which prevents the rice from becoming overly sticky or gummy. Ensure the rice is spread evenly in the pan for consistent cooking.
Timing and Pressure Release
The rice cooks in the same amount of time as the chicken (8 to 15 minutes). The 5-minute natural release is important for the rice to finish steaming properly. Quick releasing immediately can sometimes leave the rice grains undercooked or hard in the center.
Sauce Thickening and Troubleshooting
Creating a Cornstarch Slurry
A slurry is made by mixing equal parts cornstarch and cold water or broth. Never add dry cornstarch directly to the hot pot, as it will clump. Whisk the mixture until smooth, then stir it into the sauce while the Sauté function is active.
Reducing the Liquid
If you prefer a more concentrated flavor without adding cornstarch, use the Sauté function to boil the sauce uncovered. This evaporates the water and thickens the consistency through reduction. Be careful not to over-reduce, or the sauce may become too salty.
Fixing Overly Salty Sauce
If the final dish tastes too salty, stir in a tablespoon of apple cider vinegar or lemon juice to balance the flavor. Adding a few small peeled potatoes during the cooking process can also help absorb some of the excess salt. You can also stir in a dollop of sour cream or Greek yogurt before serving.
Addressing Tough Meat
If the chicken is tough, it may have been undercooked or the pressure was not maintained. Ensure the sealing valve is fully closed. If the meat is still tough after cooking, return it to the pot with a bit more liquid and pressure cook for an additional 2 to 3 minutes.
Frequently Asked Questions
Can I use a slow cooker for this recipe?
Yes, you can adapt this for a slow cooker by cooking the chicken on low for 6 to 8 hours or on high for 3 to 4 hours. The ingredients remain the same, but the cooking time is significantly longer than the pressure cooker method.
Are pepperoncinis too spicy for children?
Most mild pepperoncinis are more tangy than spicy, making them acceptable for many children. However, if you are concerned, you can use mild pickled banana peppers instead or simply remove the peppers before serving.
Can I use skin-on chicken?
It is recommended to use skinless chicken because the skin does not render well in a pressure cooker and can result in a rubbery texture. If using skin-on chicken, remove the skin after cooking but before shredding the meat.
What other seasoning packets can I use?
While Au Jus and Ranch are traditional, you can experiment with brown gravy mix or a combination of onion soup mix and garlic powder. Ensure the replacement packets have a similar salt profile to avoid overseasoning the dish.
Is it possible to add vegetables to the pot?
You can add chopped carrots or celery to the bottom of the pot for added nutrition. If adding potatoes, cut them into 1-inch chunks and place them on top of the chicken to ensure they cook through within the 8 to 15 minute window.
Print
Instant Pot Mississippi Chicken
- Total Time: 23 minutes
- Yield: 5–7 servings 1x
- Diet: General
Description
Instant Pot Mississippi Chicken is a take on the amazing Mississippi Pot Roast recipe created by Robin Chapman. Make this in your pressure cooker in under an hour. You can even cook rice with it!
Ingredients
- 2–3 lbs boneless skinless chicken thighs or breasts
- 1/2 cup water or low sodium chicken broth
- 1/2 (16 oz) jar pepperoncinis with juice
- 1 (1 oz) packet au jus or brown gravy mix
- 1 (1 oz) packet ranch dressing/seasoning mix
- 1/2 stick (4 Tbsp) unsalted butter
- 1 1/2 cups rinsed white long grain rice
- 1 1/2 cups water
Instructions
- Step: Put chicken in the bottom of the inner pot of the pressure cooker.
- Step: Add all other ingredients without stirring, close the lid, lock it, and turn the steam release knob to the sealing position.
- Step: Pressure cook for 8 minutes, or 15 minutes if using frozen breasts.
- Step: Let the pot sit undisturbed for 5 minutes for natural release, then turn the knob to venting to quick release remaining pressure.
- Step: To cook rice, place a tall trivet in the pot and set a pan with rinsed rice and water on top before starting the cook cycle.
- Step: Remove rice pan, shred the chicken, thicken liquid with cornstarch if desired, and mix chicken back in.
Notes
If using frozen breasts that cannot be cut in half, set cook time to 15 minutes. Use low sodium au jus and ranch dressing mixes to reduce overall saltiness.
- Prep Time: 10 minutes
- Cook Time: 8 minutes
- Category: Dinner
- Method: Pressure Cooking
- Cuisine: American
Nutrition
- Serving Size: 1 serving
- Calories: 325 kcal
- Sugar: 3 g
- Sodium: 1200 mg
- Fat: 15 g
- Saturated Fat: 8 g
- Unsaturated Fat: 7 g
- Trans Fat: 0 g
- Carbohydrates: 30 g
- Fiber: 1 g
- Protein: 35 g
- Cholesterol: 110 mg