
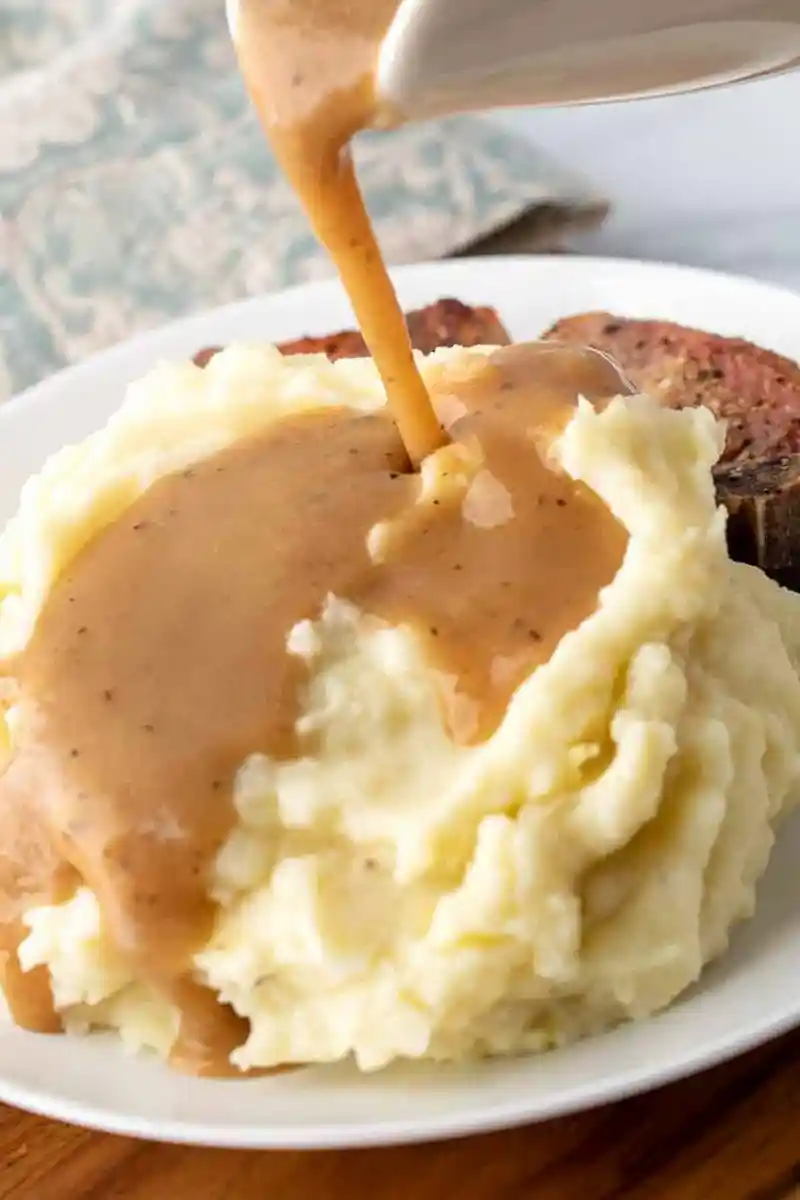
This savory brown gravy is a versatile sauce that can be prepared quickly without the need for pan drippings. It pairs perfectly with roasted meats, mashed potatoes, and a variety of steamed vegetables.
List of ingredients
- 1/4 cup butter (salted) – provides the fat base for the roux.
- 1/4 cup flour – acts as the primary thickening agent.
- 2 cups beef broth (or chicken, turkey, or veggie broth) – the liquid base that determines the final flavor profile.
- 1/2 teaspoon salt – enhances the savory notes.
- 1/4 teaspoon garlic powder – adds a subtle pungent depth.
- 1/4 teaspoon onion powder – provides a mild sweetness and aroma.
- 1/4 teaspoon pepper – adds a light spice.
- 1/8 teaspoon dried thyme – a small pinch for an earthy herbal finish.
step-by-step instructions
- Combine Base: Place the butter and flour together in a saute pan.
- Brown the Roux: Melt the butter and continue cooking over medium-low heat until the butter and flour mixture becomes very brown.
- Incorporate Liquid: Slowly add a small amount of the broth while stirring constantly with a whisk. Continue adding the remaining broth gradually until all of it is incorporated.
- Season and Heat: Stir in the salt, garlic powder, onion powder, pepper, and dried thyme, then bring the mixture to a simmer.
- Thicken: Once simmering, the gravy will begin to thicken. Continue cooking for 2-3 minutes until it reaches your preferred consistency.
- Final Taste: Taste the gravy and add additional salt or pepper if needed.
- Adjust Consistency: If the gravy is too thick, whisk in a small amount of additional broth.
- Serve: Serve the gravy hot immediately after cooking.
Mastering the Roux Technique
Control the Heat for Optimal Color
Maintain a medium-low heat setting to avoid burning the butter. A slow cook allows the flour to toast evenly and develop a deep brown color without scorching.
Identify the Brown Roux Stage
Watch for the mixture to transition from a pale gold to a rich, nutty brown. This specific stage is what gives the brown gravy its characteristic dark hue and toasted flavor.
Prevent Clumping During Mixing
Add the broth in very small increments at first, whisking vigorously after each addition. This creates a smooth paste before thinning it out, which prevents flour lumps from forming.
Use a Wire Whisk for Smoothness
A whisk is more effective than a spoon for breaking up flour pockets. Use a rapid circular motion to ensure the liquid and roux are fully emulsified.
Choosing the Best Broth
Beef Broth for Deep Flavor
Beef broth provides the most intense savory flavor and the darkest natural color. It is the traditional choice for a classic, hearty brown gravy.
Chicken or Turkey Broth for Lighter Tones
These options create a milder flavor profile that works well with poultry dishes. The color will be slightly lighter than beef-based gravy but still rich.
Vegetable Stock for Plant-Based Needs
Vegetable stock is an excellent alternative for those avoiding animal products. Ensure the stock is well-seasoned to compensate for the lack of meat proteins.
Using Bone Broth for Extra Body
Bone broth contains more gelatin than standard store-bought broth. This results in a naturally thicker gravy with a more luxurious mouthfeel.
Recommended Kitchen Equipment
Heavy-Bottomed Saute Pan
Use a pan with a thick base to distribute heat evenly. This prevents hot spots that could cause the roux to burn in one area of the pan.
Stainless Steel or Non-Stick Pan
Stainless steel allows for better browning of the flour, while non-stick makes cleaning easier. Both are acceptable as long as the heat is managed carefully.
Sturdy Wire Whisk
A whisk with several loops is essential for incorporating the liquid. It ensures the flour is distributed evenly throughout the broth.
Creative Serving Suggestions
Pairing with Root Vegetables
Pour the gravy over creamy mashed potatoes, roasted carrots, or parsnips. The savory saltiness of the gravy balances the natural sweetness of these vegetables.
Enhancing Roasted Meats
This gravy is ideal for roasted chicken, turkey, or beef roast. It adds moisture to the meat and concentrates the overall flavor of the meal.
Using as a Base for Poutine
Drizzle the thickened gravy over a plate of crispy french fries and cheese curds. Ensure the gravy is piping hot to slightly melt the cheese.
Serving with Savory Biscuits
Use the gravy to top open-faced biscuit sandwiches. This creates a hearty breakfast or brunch option when paired with a side of eggs.
Storage and Preservation
Refrigeration Guidelines
Store leftover gravy in an airtight container in the refrigerator. It will remain fresh and safe to eat for 3 to 4 days.
Preventing Skin Formation
Press a piece of plastic wrap directly onto the surface of the gravy before sealing the container. This prevents a tough skin from forming on top during cooling.
Freezing for Long Term Use
Transfer cooled gravy into freezer-safe bags or containers, leaving room for expansion. Properly frozen gravy can be stored for up to 3 months.
Thawing Process
Move the frozen gravy to the refrigerator overnight to thaw slowly. This maintains the emulsion better than thawing at room temperature.
Reheating Instructions
Stovetop Reheating Method
Place the gravy in a small saucepan over medium-low heat. Stir frequently to ensure the bottom does not burn as it reaches a simmer.
Microwave Reheating Method
Heat the gravy in a microwave-safe bowl in 30-second intervals. Stir between each interval to distribute the heat evenly.
Adjusting Thickness After Reheating
Gravy often thickens further during cooling and reheating. Whisk in a tablespoon of water or broth to restore the original smooth consistency.
Troubleshooting Common Issues
Fixing Lumpy Gravy
If lumps appear, pour the finished gravy through a fine-meshed sieve. Use a ladle to push the liquid through while leaving the lumps behind.
Correcting a Pale Color
If the gravy is too light, it means the roux was not cooked long enough. In future batches, allow the butter and flour to brown further before adding broth.
Managing Overly Thick Consistency
If the gravy is too thick to pour, whisk in extra broth one tablespoon at a time. Continue until the sauce glides smoothly off the spoon.
Solving Thin or Watery Gravy
Simmer the gravy for a few extra minutes to reduce the liquid. If it remains thin, whisk a teaspoon of cornstarch into a teaspoon of water and stir the slurry into the boiling gravy.
Reducing Excess Saltiness
If the gravy is too salty, add a splash of unsalted broth or water. A small amount of cream or unsalted butter can also help mellow the salt flavor.
Frequently Asked Questions
What is a roux?
A roux is a cooked mixture of equal parts fat and flour. It serves as the thickening agent for many sauces and gravies.
Can I use unsalted butter?
Yes, you can use unsalted butter. However, you may need to increase the amount of added salt to maintain the same flavor profile.
Can I make this gravy without a whisk?
While a whisk is preferred, a fork can work in a pinch. You will need to stir more vigorously to prevent the flour from clumping.
How do I know when the roux is done?
The roux is ready when it reaches a deep brown color and smells slightly nutty. Be careful not to let it turn black, as this will taste bitter.
Can I use cornstarch instead of flour?
Cornstarch can be used as a thickener, but it will not provide the same toasted flavor as a flour-based roux. You would mix the cornstarch with cold liquid first rather than cooking it with butter.
Is it possible to use pan drippings?
Yes, you can replace the butter with an equal amount of meat drippings. Remove excess grease first to ensure the gravy is not overly oily.
Print
Simple Homemade Brown Gravy
- Total Time: 15 minutes
- Yield: 2 cups 1x
- Diet: General
Description
A delicious brown gravy made without pan drippings. Make with beef, chicken, turkey, or vegetable stock.
Ingredients
- ¼ cup butter (salted)
- ¼ cup flour
- 2 cups beef broth (or chicken, turkey, or veggie broth)
- ½ teaspoon salt
- ¼ teaspoon garlic powder
- ¼ teaspoon onion powder
- ¼ teaspoon pepper
- ⅛ teaspoon dried thyme
Instructions
- Step: Place butter and flour together in a saute pan
- Step: Melt the butter and continue cooking over medium low heat until the butter mixture becomes very brown
- Step: Slowly add a bit of the broth, stirring with a whisk. Continue adding broth until all broth is added
- Step: Add seasoning and bring to a simmer
- Step: Once simmering, the gravy will begin to thicken. Continue cooking for 2-3 minutes until it has thickened to your liking.
- Step: Taste and add additional salt and pepper if needed
- Step: If gravy is too thick, add just a bit more broth
- Step: Serve hot
Notes
The key to the color and flavor is really browning the butter and flour together. Any type of broth or stock can be used (beef, chicken, turkey, or veggie). Slowly add the broth while whisking to prevent lumps. Store leftover gravy in a covered container in the refrigerator for 3-4 days.
- Prep Time: 5 minutes
- Cook Time: 10 minutes
- Category: Side Dish
- Method: Stovetop
- Cuisine: American
Nutrition
- Serving Size: 0.25 cup
- Calories: 70 kcal
- Sugar: 0.02 g
- Sodium: 414 mg
- Fat: 6 g
- Saturated Fat: 4 g
- Unsaturated Fat: 2.2 g
- Trans Fat: 0.2 g
- Carbohydrates: 3 g
- Fiber: 0.1 g
- Protein: 1 g
- Cholesterol: 15 mg